CommunityWD 307 · pp. 2–5
Mat Ward previews a consolidated Lord of the Rings rules manual and a separate Fellowship narrative supplement, explaining their different purposes. Further news introduces the Wood Elf Wild Riders, completes the new Human Blood Bowl team and reports the Sheffield gaming centre’s opening, where Paul Rudge’s Mûmak remains unbeaten. Other items cover Tallarn Mukaali riders, Liber Chaotica, new roleplaying and Black Library books, and an appeal for artists to reclaim work held in the archive.
Middle-earth Strategy Battle GameWarhammer Fantasy BattlesWood Elves
EditorialWD 307 · pp. 6–7
Guy Haley explains his long attachment to Goblins and marks Paul Sawyer’s move into a marketing role after years at White Dwarf. Christian Byrne nears completion of his Chaos army and recalls a store visit with Asger Granerud. Nick Kyme loses a final Necromunda match to HiveNet but continues his Dwarf winning streak, Paul Rudge celebrates more Mûmak victories, and Greg MacGregor describes a drawn Eldar–Tau Recon game decided by mobility.
Warhammer Fantasy BattlesWarhammer 40,000Orcs & Goblins
LoreWD 307 · pp. 15–19
Mat Ward portrays Athel Loren as a watchful, dangerous forest whose Wood Elf inhabitants share its unpredictable nature and survival. Their apparent beauty conceals ruthless treatment of intruders, while Glade Guard fight as independent, mobile kinbands. The preview introduces shape-changing Dryads, Orion’s transformed Wild Riders and Wardancers devoted to Loec, explaining how the army’s different inhabitants embody the forest’s character rather than presenting them as straightforward benevolent guardians.
Warhammer Fantasy BattlesWood Elves
TacticsWD 307 · pp. 20–25
Brian Folcarelli and Kevin Coleman explain how the Lustria rules change familiar army choices. Empire troops must account for humidity, restricted flight, quicksand and Loose Order, while detachments and mobile archers retain useful roles. Kevin shows how Red Crested Skinks use speed and terrain to combine charges, and why the Red Host’s compulsory Lore of Beasts supports that plan. Both stress changing formation and coordinating movement rather than applying open-field tactics unchanged.
Warhammer Fantasy BattlesThe Empire
TacticsWD 307 · pp. 20–23
Brian Folcarelli recommends infantry and flexible detachments for Empire expeditions, noting that quicksand makes exceptionally heavy armour dangerous and Loose Order stops many shooting troops firing. Swordsmen and Free Companies adapt better than Spearmen, while Archers and Huntsmen provide mobile fire. Small knight units, Pistoliers and carefully positioned cannon can still help, but mortars lose value against dispersed targets. A Helblaster offers powerful area defence at the familiar risk of destroying itself.
Warhammer Fantasy BattlesThe Empire
TacticsWD 307 · pp. 23–25
Kevin Coleman treats formation changes as an active tactical tool: infantry can move through jungle in Loose Order and reform into ranks when a defensible position offers better combat resolution. Red Crested Skinks combine unimpeded movement, charge attacks and rank bonuses with supporting Skink skirmishers. The Lore of Beasts rallies vulnerable units, discourages dangerous monsters, strengthens Priests and adds movement. An encounter warning reminds players that hiding a lone wizard in scenery can expose him to lethal local wildlife.
Warhammer Fantasy BattlesLizardmen
ModellingWD 307 · pp. 26–31
Adi Wood contrasts the open killing ground of a conventional pitched battle with a Lustrian board whose vegetation controls movement and visibility. Four terrain classes are represented by increasing the density of foliage, trees and plastic plants, making their different game effects visible. The guide also shows how existing woods and hills can be moved into the middle of a table to create channels and ambush opportunities, and recommends covering roughly one third to one half of the board.
Warhammer Fantasy Battles
ModellingWD 307 · pp. 28–29
The same basic materials build four distinct grades of jungle. Undergrowth uses low foliage with room for bases, light jungle leaves paths through plants, dense jungle uses closely set bamboo trunks with gaps for individual models, and impenetrable jungle packs the vegetation into a continuous barrier. Six- to eight-inch undergrowth bases offer flexible placement. The instructions emphasize matching visible density to the terrain category players will use during a game.
Warhammer Fantasy Battles
TacticsWD 307 · pp. 30–31
A jungle board should contain plentiful light jungle, about a third of its jungle terrain as dense growth, and only one or two pieces each of undergrowth and impenetrable vegetation. This mix supplies routes that ordinary infantry can use without removing obstacles to cavalry and artillery. An alternative layout repositions existing scenery into the centre, demonstrating that blocking lines of sight and guiding movement can create a jungle battle even before new trees are built.
Warhammer Fantasy Battles
LoreWD 307 · pp. 32–35
Andy Hoare examines contradictory accounts of Lustria’s Amazons, from Norse chronicles of warrior-mystics to Drivot’s claim that they served the creators during the world’s earliest age. Other theories link them to outcast Norse women, but none settles their origin. Their High Age weapons and occupation of Lizardmen ruins imply unusual access to ancient power; dealings with the Lizardmen and invading armies vary between cooperation and violence. The feature concludes with rules for an allied Serpent Priestess.
Warhammer Fantasy BattlesAmazons
RulesWD 307 · p. 35
A Serpent Priestess is a 235-point Dogs of War ally occupying both Hero and Rare allowances. Several armies can hire her normally; darker forces instead grant an equivalent free Priestess to their opponent, while still using the selection slots. She is a Level 3 wizard protected by a warding amulet, armed with an armour-piercing High Age blade and immune to the relevant Lustrian encounters. The author asks players to agree on these character-like rules before a battle.
Warhammer Fantasy BattlesAmazons
RulesWD 307 · p. 35
Six Amazon spells turn the jungle and its spirits into weapons. Singing Wind supplies a breath attack, Serpent’s Strength empowers nearby friends and Wendala’s Maelstrom reduces incoming shooting accuracy. Shield of Thorns harms enemies charging the Priestess, The Living Jungle unleashes numerous low-strength missile hits, and Siren’s Dream weakens the movement and attacks of nearby susceptible foes. The list combines personal protection with support for an allied army rather than reproducing a standard magic lore.
Warhammer Fantasy BattlesAmazons
CampaignWD 307 · pp. 38–43
The second Lustrian campaign turn sees Asger Granerud’s Nurgle Daemons attack both Stephen Green’s Temple of Constellations and Dave Allen’s Blood Pyramid, while Paul Scott and Stephen contest the Pirate Encampment. Asger wins both encounters, although the Orc battle is close, and Paul’s mercenary-backed Empire beats the Tomb Kings. The diaries track reduced monthly purchases and the table records plunder and rebuilding before the series’ final turn. Jungle encounters and movement restrictions repeatedly alter the battles.
Warhammer Fantasy BattlesNurgle
Battle reportWD 307 · pp. 39–40
Asger’s Daemons use buildings to shelter expensive models from Stephen’s Screaming Skull Catapult before engaging the Tomb Kings in prolonged combats. A risky moment sees the Exalted Daemon fail to wound archers and face instability, but the army generally survives long enough to grind down its opponents. Plaguebearers eventually catch the Tomb Prince, while Stephen destroys the chariot when it emerges from cover. Asger wins decisively but acknowledges that several small rolls could have changed the result.
Warhammer Fantasy BattlesNurgle
Battle reportWD 307 · p. 41
Stephen chooses to defend a Break Through mission against Paul’s Empire, strengthened with hired Duellists and a Maneater. Disaster follows as the undead catapult collapses, the Scorpion dies underground and jungle encounters wound the Hierophant. The Maneater kills the Tomb Prince before falling, while Paul’s infantry and knights steadily destroy the remaining skeletons. Stephen’s last attempt to hold the advance with bowmen fails, giving the Empire the victory.
Warhammer Fantasy BattlesTomb Kings
Battle reportWD 307 · pp. 42–43
Dave attempts to inconvenience Asger by choosing Flank Attack, but discovers that the attacker need not reserve a full third of the army. Asger nevertheless sends substantial units around the flank. The Orcs destroy the Exalted Daemon and Herald through instability, yet repeated Stupidity, panic and well-timed reinforcements keep Dave under pressure. A late chariot attack breaks Borgut’s unit, and possession of a table quarter converts broadly comparable losses into a solid daemon victory.
Warhammer Fantasy BattlesOrcs & Goblins
LoreWD 307 · pp. 44–49
Pete Haines presents Barak Varr as a wealthy port carved into coastal cliffs, defended by an iron fleet and renowned for hospitality and international trade. Its Sea Engineers power vessels without sails or oars, and ancient charts make distant voyages possible. King Byrrnoth’s quest against the dragon that killed his family ultimately turns him toward traditional Dwarf values. The closing army guide links troop choices, mercenaries, dress and symbols to the hold’s commercial and maritime character.
Warhammer Fantasy BattlesDwarfs
LoreWD 307 · pp. 45–46
Byrrnoth Grundadrakk begins as an outward-looking royal son interested in merchants and iron ships. After Dark Elf corsairs and the sea dragon Mauldekorr kill his father and brother, he spends more than twenty years hunting the beast. Swallowed during the final confrontation, he cuts his way out and survives with a permanent leg injury. His return brings honour but also a new insistence on ancestral customs and stronger ties with the mountain holds.
Warhammer Fantasy BattlesDwarfs
RulesWD 307 · p. 46
The article suggests a 225-point representation of Byrrnoth for a Barak Varr army of at least 2,000 points. He occupies a Lord choice and carries Rhymakangaz, an axe bearing a Rune of Might and Grudge Rune, together with Gromril armour and a heavily runed shield. His profile uses the ordinary Dwarf rules for resolve, relentless marching and ancestral hatred, making this a themed application of the existing army book.
Warhammer Fantasy BattlesDwarfs
ModellingWD 307 · p. 46
Nick Kyme converts King Alrik into a seafaring monarch by replacing the helmet with Thorgrim’s and building an axe from a Dwarf Lord weapon and Ungrim Ironfist’s dragon motif. A Skaven cloak, Kazador’s horn and Alrik’s book add equipment and silhouette changes, while a Barak Varr shield identifies the hold. The conversion aims to retain royal bearing while making Byrrnoth distinct from the donor character.
Warhammer Fantasy BattlesDwarfs
LoreWD 307 · p. 47
The Sea Engineers’ inventions range from river-patrolling Monitors to ocean-going Ironclads, immense Dreadnoughts and the submersible Nautilus. Steam and metal let Dwarfs claim mastery over a sea they otherwise distrust, although their navigation owes an unacknowledged debt to Elven charts. Mungrun Steelhammer’s expedition to sunken Chupayotl ends in tragedy, with a lone broken survivor returning decades later and speaking only of black eyes and webbed claws.
Warhammer Fantasy BattlesDwarfs
TacticsWD 307 · pp. 48–49
Barak Varr armies usually travel abroad to defend trade rather than their exceptionally secure home. Engineers and cannon are plentiful, while Rangers, Miners, Slayers and Gyrocopters are less typical; Hammerers accompany the king and Ironbreakers guard the vital underground routes. Wealth supports varied, luxurious clothing and private mercenary ventures. The guide distinguishes thematic frequency from compulsory restrictions, allowing ordinary Dwarf army-book choices while explaining why particular units fit the hold.
Warhammer Fantasy BattlesDwarfs
RulesWD 307 · p. 48
Torston’s mercenary Dwarfs pursue defaulting merchants and accept other work when necessary. The minimum company of ten includes Torston, a standard and a musician, with additional warriors purchased individually. Great weapons and throwing axes suit their aggressive role, while a grudge rooted in an Athel Loren incident makes them hate every kind of Elf and refuse Elven employers. They occupy a Special choice for Dogs of War or a Rare choice elsewhere.
Warhammer Fantasy BattlesDwarfs
CommunityWD 307 · pp. 50–54
The competition guide explains the 2005 move to Birmingham’s NEC and sets out ten main categories plus Youngbloods and the Open competition. It clarifies appropriate gaming bases, removable scenic displays, eligible models and restrictions on mixing Middle-earth components with other ranges. Category descriptions distinguish single models, units, vehicles, monsters, duels and dioramas, with previous winners illustrating the standards. There is no separate large-model category this year, so Inquisitor entries belong in Open.
Warhammer Fantasy BattlesWarhammer 40,000
TacticsWD 307 · pp. 56–61
Marshall Jansen organizes Tyranid strategy around numbers, focused roles, repeated useful brood types and reliable Synapse. He compares horde, fast-assault, elite, monster-heavy and shooting armies, stressing what each gives up as well as gains. Practical deployment and board-control advice explains overlapping Synapse, sensible use of reserves and timing assaults to remain protected during the enemy turn. Biomorph spending is judged against the extra bodies and scoring broods it would otherwise buy.
Warhammer 40,000Tyranids
TacticsWD 307 · pp. 58–59
Five swarm patterns illustrate different priorities. A horde wins through inexpensive bodies, fast assault relies on coordinated speed and mobile Synapse, and elite Genestealer–Warrior forces sacrifice numbers for independence. Monster-heavy armies can field many great beasts but struggle with scoring bodies and escalation, while shooting swarms exploit numerous powerful short-ranged weapons. Jansen recommends focused, economical builds and warns beginners that unusual variants demand careful deployment and support.
Warhammer 40,000Tyranids
TacticsWD 307 · p. 60
A trial deployment tests whether the Synapse network really covers the army before a game begins. Gaunts should ideally have two supporting nodes so that one casualty cannot collapse a flank; fast creatures need winged support or correctly positioned trailing models to stay connected after charging. Diagrammed examples show how an apparently strong attack fails when it outruns its controllers. Units independent of Synapse can instead occupy a separate flank when coverage is limited.
Warhammer 40,000Tyranids
RulesWD 307 · pp. 62–65
Phil Kelly adapts the fourth-edition rulebook’s Kill-team game to Tyranid infiltrators, survivors and specialist vanguard organisms. One mutable-law breach is free, allowing more varied converted broods, and the teams operate through brood telepathy rather than ordinary Instinctive Behaviour. Alternative missions replace unsuitable human sabotage tasks, while organic specialist abilities stand in for conventional equipment. Separate options let Tyranid Brutes react through Synapse, telepathic alarms or additional Genestealer guards.
Warhammer 40,000Tyranids
RulesWD 307 · p. 63
Steal the Genes requires a nominated feeder-tendrilled organism to obtain a suitable sample from a slain Brute and escape. Hunt the Leader-beast instead targets the Boss Brute, while Capture and Dissect uses stranglewebs to immobilise a randomly determined number of victims and carry them off the board. These alternatives make objectives fit Tyranid biology and the Hive Mind’s purposes; the author excludes the ordinary Sabotage and Reconnoitre missions for these teams.
Warhammer 40,000Tyranids
RulesWD 307 · pp. 64–65
Acid Blood punishes enemies in contact with a slain team member, the strangleweb pins targets and a toxin-bearing spike rifle wounds consistently while penetrating armour. Horror in the Dark makes Brutes test before assaulting. Tyranid-controlled defenders gain options including an infiltrated Redshirt, leadership support from a nearby Boss, faster activation through telepathy and a dedicated Genestealer guard squad. The article explicitly removes conventional gadgets whose effects do not fit alien organisms.
Warhammer 40,000Tyranids
ModellingWD 307 · pp. 66–69
Marco Schulze and Katja Schimmel convert a small band of mutant Tyranids separated from its hive fleet, giving each a recognisable role and cinematic pose. Their ten-model team includes a psychic Genestealer, a sniper, a strangleweb carrier, a toxin-fed combat mutant and supporting beasts. Re-cut body sections, PVA-strengthened card armour, wire, spare weapons and seashell bases provide the unusual forms. The project prioritizes visual storytelling over initially strict Kill-team legality and supplies no named painting recipe.
Warhammer 40,000Tyranids
ModellingWD 307 · p. 67
The team’s psychic leader combines a floating classic Zoanthrope body with Genestealer limbs, an enlarged cranium and wire feeder tendrils. Metal Hormagaunt talons add another predatory element, while a tank-sprue officer becomes a captive held by PVA-soaked string. Although the model counts as an ordinary Genestealer for play, its construction communicates a Synapse-like intelligence and gives a farewell role to the older Genestealer sculpt.
Warhammer 40,000Tyranids
ModellingWD 307 · pp. 68–69
The strangleweb combines a devourer, barbed strangler, Spore Mine reservoir and flexible Chaos component, while the combat mutant receives a large poison sac and wire feed tubes. A sniper stretches a deathspitter barrel onto a fleshborer and adds a biological targeting array from spare symbiote parts. Hong Kong action-film poses animate the Spinegaunts, and a small face parasite reuses an adrenal sac and devourer spikes. The conversions communicate equipment through shape rather than identical brood anatomy.
Warhammer 40,000Tyranids
Battle reportWD 307 · pp. 70–81
Phil Kelly commands the Crimson Stalkers against Adam Troke’s 33 Ork Brutes on an industrial board, trying to kill as many defenders as possible before his ten Tyranids die. Speed and consolidation let the team isolate squads, but every noisy encounter increases the defenders’ Klaxon advantage. Skabgut stays on a rooftop shooting while Phil races along gantries and through the complex.
Warhammer 40,000Tyranids
RulesWD 307 · p. 71
The last Tyranids on a defeated world fight without a central objective, measuring success by the number of Brutes killed before the team is destroyed. Six ranks run from Ripper at five ordinary casualties to Hive Tyrant at thirty, with lower thresholds when opponents wear 3+ armour. The mission supports a doomed last stand and a clear escalating challenge rather than requiring the survivors to extract or disable human machinery.
Warhammer 40,000Tyranids
FictionWD 307 · p. 71
Lugrak Twofeet proudly reports the apparent extermination of the Tyranids after a noisy romp through the industrial plaza. In Skabgut’s interrogation room he discovers another Ork being held in the boss’s huge claw because a few aliens escaped. His amended claim that he killed the last few fails to save him: Skabgut crushes his head and bellows for the remaining monsters to be found. The scene establishes the Brutes’ panic behind their bravado.
Warhammer 40,000Orks
ModellingWD 307 · pp. 82–87
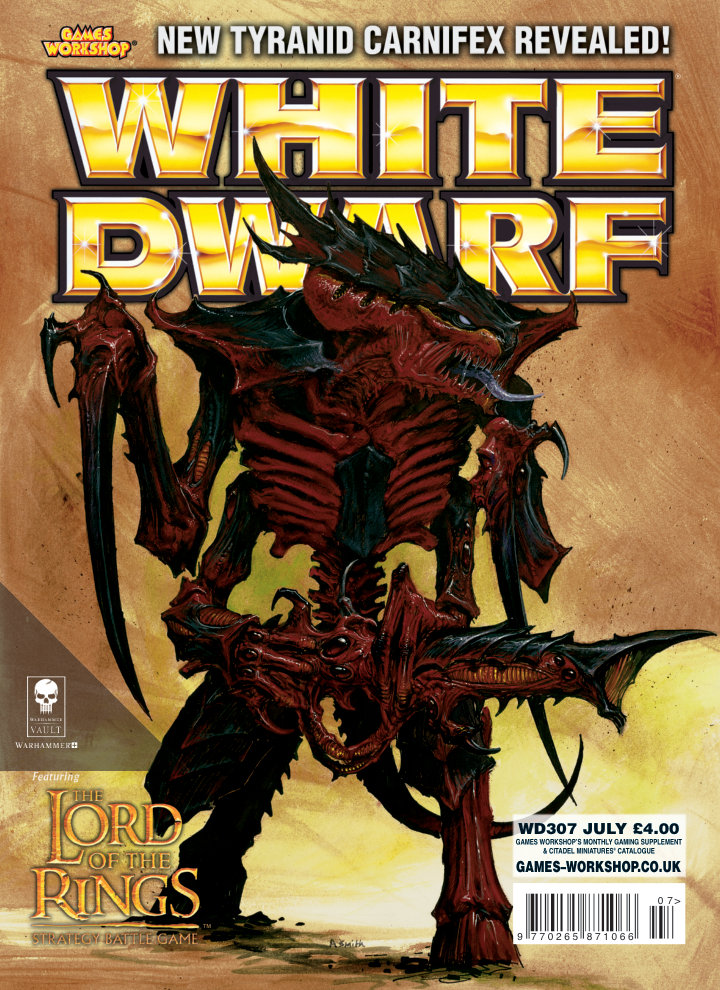
Guy Haley builds the new plastic Carnifex for an exaggeratedly spiky, attacking silhouette, using the kit’s many optional parts rather than a major scratch conversion. He adjusts the torso connection, tests its angle before gluing and chooses a symmetrical spread of spikes. A detailed painting sequence creates naturalistic horn and chitin through browns, pale stripes and ink washes. An accompanying studio tip demonstrates interchangeable weapons using pinned joints or magnets, extending the kit’s usefulness across different configurations.
Warhammer 40,000Tyranids14 paint colours
LoreWD 307 · pp. 84–85
An Imperial-style illustrated dossier identifies the Carnifex’s changing anatomy and living weapons, including spore cysts, spine banks, adrenal glands and alternative tails. It presents deathspitters, devourers, barbed stranglers, scything talons and crushing claws as adaptations to different targets. A Magos’s commentary frames the many interchangeable model components as growing biological divergence, suggesting that hive fleets tailor assault beasts to the resistance encountered on each world.
Warhammer 40,000Tyranids
PaintingWD 307 · pp. 86–87
Graveyard Earth and generous Brown Ink establish the Carnifex’s chitin, followed by pale drybrushing and fine carapace stripes that resemble horn. The underside is warmer and lighter, while black claws and spines provide contrast. Red ink and gloss emphasize the soft vents, the tongue receives Tentacle Pink and Purple Ink, and toxin blisters are tinted green and purple. The guide recommends painting separate parts and removing mould lines before washes expose them.
Warhammer 40,000Tyranids14 paint colours
ModellingWD 307 · p. 87
The ’Eavy Metal team makes the Carnifex’s spare heads and weapons interchangeable by painting them separately, drilling matching holes and inserting brass rods without permanently gluing the joints. Two pins per part prevent pieces rotating or falling loose in play. Keith Robertson’s alternative places small powerful magnets inside the components, allowing rapid changes while warning that the poles must face the correct way before installation.
Warhammer 40,000Tyranids
CampaignWD 307 · pp. 88–91
Andy Hoare and Phil Kelly begin a three-part invasion series with the discovery and infiltration of a prey world. Scout vessels seed Lictors, Genestealers and other vanguard organisms; growing hybrid communities create a psychic beacon, although some full invasions occur without detected infiltrators. A themed scenario recreates the first landings amid atmospheric spores, and a modelling project builds the mycetic vessels that carry the attackers. These elements let a campaign develop through distinct biological stages.
Warhammer 40,000Tyranids4 paint colours
RulesWD 307 · p. 89
A restricted Tyranid vanguard lands by Deep Strike while previously infiltrated broods emerge nearby. The attacker receives accelerated Reserve rolls from the first turn, and each arriving brood places a mycetic spore marker. Six turns of Victory Points fighting are complicated by random spore clouds that shorten weapon range, hinder rallying or damage stationary non-Tyranid troops. The defenders must exploit staggered arrivals before the invasion accumulates overwhelming strength.
Warhammer 40,000Tyranids
ModellingWD 307 · pp. 90–91
A cut polystyrene egg sits in a shallow depression in a bevelled foamboard base, creating a biological drop vessel embedded in the earth. Six Lictor talons form its outer ribs and lower anchors; devourer components, scored openings, pressed hollows and Green Stuff add organic detail before filler supplies texture. Liche Purple spines are highlighted toward bone, while the fleshy sacs progress from Bestial Brown through Vomit Brown and Bleached Bone to match the studio swarm.
Warhammer 40,000Tyranids4 paint colours
ModellingWD 307 · p. 92
Al Bickham gives Tau Crisis suits running and airborne poses by reworking the legs instead of accepting the kit’s fixed stance. A leg is combined with an opposite-side arm component after selected portions are removed and joint lines carved into the plastic. The join is pinned for strength, and additional trimming sharpens the angle for a running suit. Photographs distinguish the more acute grounded pose from the extended flying alternative.
Warhammer 40,000Tau Empire
ModellingWD 307 · pp. 94–97
Guy Haley links scenery to the regions of the War of the Ring campaign, from Shire farmland and northern snows to forests, eastern plains, Harad’s deserts and volcanic Mordor. Gondor’s settlements and rivers create opportunities for siege and waterborne games. Mat Baxter then demonstrates two reusable scatter pieces: a layered-polystyrene Warg cave and a Haradrim tent made from PVA-stiffened paper towel. Both are finished to blend with larger terrain collections.
Middle-earth Strategy Battle Game9 paint colours
ModellingWD 307 · p. 96
Mat Baxter builds a rocky outcrop on bevelled MDF, cutting and sanding polystyrene before adding gravel and sand. Larger pieces use stacked layers, with the cave hollowed before final attachment to preserve access. Brushed black paint avoids damaging the foam, then mixed and pure greys and a little white pick out the rock. Coarse scatter and static grass soften the result into a Warg lair or Goblin entrance.
Middle-earth Strategy Battle GameWargs3 paint colours
ModellingWD 307 · p. 97
Cocktail sticks fixed to an MDF base support a paper towel soaked in diluted PVA, which hardens into a tent. Clipped stick ends become pegs and sand finishes the ground. Bestial Brown cloth is drybrushed with Graveyard Earth and Bleached Bone, then decorated with Red Gore and Blood Red designs inspired by the film’s Mûmakil. Changing the shape or decoration adapts the same construction to other Middle-earth armies.
Middle-earth Strategy Battle GameHarad6 paint colours
CampaignWD 307 · pp. 98–109
Mat Ward and Pete Haines translate the Second Age war into a map campaign with separately rostered armies, alternating movement, terrain difficulty and a six-scenario battle table. Casualties can become permanent losses, surviving heroes recover resources between games and defeated armies retreat according to the severity of their defeat. Required Good heroes and banners connect the campaign to its historical setting, while counts-as suggestions let Third Age collections represent earlier peoples.
Middle-earth Strategy Battle GameGondor
RulesWD 307 · p. 98
Elendil’s younger son joins the Last Alliance campaign as a 100-point optional Good hero, equipped with sword, shield and finely made heavy armour. Boldest of the Bold raises his Courage specifically when testing to charge a terrifying enemy, reflecting his determination against overwhelming foes. Dominic Murray’s accompanying model combines a sword-bearing Captain of Minas Tirith with Isildur’s head, providing a simple way to distinguish Anárion in an existing collection.
Middle-earth Strategy Battle GameGondor
RulesWD 307 · p. 102
An advancing army deploys first in a central position while the opponent can distribute forces among surrounding boxes, creating an ambush rather than a symmetrical approach. The defender starts with priority, giving the encircling force the initiative. Victory compares the points value of surviving models, with a two-to-one advantage earning a major result. The arrangement tests whether a concentrated force can escape or defeat enemies positioned around it.
Middle-earth Strategy Battle Game
RulesWD 307 · p. 103
Opposing forces advance from opposite edges during a night engagement, with Good taking initial priority. Limited visibility restricts both shooting and charges, Elven cloaks shorten detection further and large creatures remain conspicuous; volley fire is prohibited. The result adds models reaching the enemy deployment zone to casualties inflicted, so movement through the darkness can matter as much as killing. Doubling the opponent’s final score upgrades the victory.
Middle-earth Strategy Battle Game
RulesWD 307 · p. 104
Each side’s highest-valued hero becomes its commander and competes to inflict more points of melee casualties than the opposing leader. Killing the enemy commander earns a substantial bonus, but losing one’s own leader subtracts from the score, making reckless personal glory risky. The scenario accommodates armies whose heroes have already died by promoting the most expensive warrior instead. It makes command figures active participants while tying the final result to their survival.
Middle-earth Strategy Battle Game
RulesWD 307 · p. 105
Three ruined settlements, wagons or encampments become resources sought by marching armies. An objective is controlled only when a player has a model on it and no enemy remains there. Holding more objectives earns a minor victory and taking all three earns a major one; if neither condition decides the battle, casualties break the deadlock. The objectives themselves count as debris, so securing them also means fighting through their broken surroundings.
Middle-earth Strategy Battle Game
RulesWD 307 · p. 106
Both armies try to move troops off designated exits while also reducing the opposing force. Scoring combines the value of enemy models killed with friendly models that have escaped, rewarding a balanced plan rather than an uninterrupted fight. The defender deploys first and rocky hills count as difficult ground, shaping the routes toward each flank. A doubled final score distinguishes a major victory from a narrower success.
Middle-earth Strategy Battle Game
RulesWD 307 · p. 107
A fixed banner marker anchors the defender’s deployment, while the attacker can set up elsewhere at a safe distance. Sole possession of the marker at the end earns a large points bonus in addition to the value of casualties inflicted. The banner cannot move and supplies none of a normal standard’s combat benefits, keeping its role purely as an objective. The final comparison determines a minor or major campaign result.
Middle-earth Strategy Battle Game
RulesWD 307 · pp. 108–109
The surviving Last Alliance confronts Mordor on the rocky slopes of Mount Doom. Sauron enters after the first turn on a successful priority-phase roll; Good must kill him while Evil must eliminate Elrond, Gil-galad, Elendil and Isildur. A campaign reinforcement table rewards armies that preserved their strength in earlier battles, and heroes permanently lost cannot return for the finale. A separate equal-points version specifies hero and bow limits for replay with other forces.
Middle-earth Strategy Battle GameMordor
RulesWD 307 · pp. 110–111
Mat Ward follows the fall of Arnor with the Free Peoples’ attempt to expel the Witch-king from Fornost. Gondor, Elves, Rangers and Hobbit archers assault a force of Orcs, spectral warriors and other Angmar creatures, using profiles introduced in issue305. Good must kill the Witch-king and reduce his force to a quarter of its original size, while Evil needs two Good heroes slain. Deployment around a broken wall frames the fight as the liberation of a ruined city.
Middle-earth Strategy Battle GameAngmar
RulesWD 307 · pp. 112–115
Mat Ward adds priced defensive equipment to make siege play more varied. Pitch ditches can ignite under attackers, rallying points improve courage and act as banners, and spiked barricades punish crossings or misplaced blows. Gibbets cause terror while hardening the enemy’s resolve, rocks and boiling oil turn battlements into lethal firing positions, burning carcases reveal night attackers and removable access platforms connect layered defences.
Middle-earth Strategy Battle Game1 paint colour
RulesWD 307 · pp. 116–117
Graham McNeill’s scenario traps Captain Berengar’s Gondorians in the neglected fortress of Minas Sirion after an Orc ambush destroys their horses. A broken wall, mountain valley and central tower create a desperate defence supported by the newly published siege equipment. Either side wins by killing all enemy heroes and reducing the opposing army below half strength; Berengar keeps his troops from testing for a broken force while alive. An alternative version uses 500 defending points against 1,000 attackers.
Middle-earth Strategy Battle GameGondor
Battle reportWD 307 · p. 118
After Paul Rudge’s Mûmak survives a day of challenges, he and Rik Turner stage three informal duels against the Balrog. Repeated stampedes and the Mahûd rider’s Heroic Moves deny the Balrog opportunities to recover, and the Mûmak wins every encounter despite occasional wounds in return. The authors frame the exercise as entertainment rather than proof that the beast is unbeatable, acknowledging that other opponents and tactics can kill it.
Middle-earth Strategy Battle GameHarad
PaintingWD 307 · pp. 138–141
Adi Wood treats bases as an important part of an army’s appearance, matching overall colour to likely gaming tables and combining textures for variety. Worked examples cover sand, gravel, flock, static grass, snow, putty craters and small pools, followed by layered mixed-material finishes. The guide explains sealing loose texture and tinting static grass after application. A closing gallery shows different approaches on Farsight, Typhus and a Silver Helm, without adding unprinted recipes for those models.
22 paint colours
ModellingWD 307 · p. 138
Small rings of mixed Green Stuff are pressed onto the base and blended into natural raised rims with a sculpting tool. Once cured, a black undercoat unifies the surface before successive Bestial Brown, Snakebite Leather and Bleached Bone drybrushes reveal the texture. The miniature craters demonstrate how modelling putty normally used for gaps or sculpted details can establish a distinctive ground surface for an entire unit.
4 paint colours
PaintingWD 307 · p. 139
Several sand finishes range from dark brown and ochre to reddish earth, ink-stained natural sand and green ground. Step sequences use controlled overbrushing and progressively lighter drybrushing to reveal grains without obscuring their darker recesses. The accompanying application advice seals loose texture with diluted PVA and recommends adding static grass in patches over other materials, with optional pale or yellow-brown highlights to tone down its artificial brightness.
12 paint colours
PaintingWD 307 · p. 139
A gravel-covered base is painted Scorched Brown, then drybrushed Codex Grey and Bleached Bone to create stony ground with shaded gaps. Sand can be added while the initial glue is still wet to fill spaces between larger fragments. Once everything dries, diluted PVA locks the texture in place before painting. The example separates the coarse structural texture of gravel from the finer surface provided by sand.
3 paint colours
PaintingWD 307 · p. 140
Gravel and sand are arranged around a clear hollow, preserving space for a small pool instead of covering the whole base. Bestial Brown, Snakebite Leather and Bleached Bone finish the surrounding ground, then layers of Ardcoat, Gloss Varnish or PVA fill the centre to suggest water. The method uses a simple recess and transparent finish rather than requiring a separate resin pour.
5 paint colours
PaintingWD 307 · p. 140
Multiple examples combine painted sand, gravel, flock, filler, foliage and static grass into less uniform bases. Contrasting brown and green patches let a model blend with different tables, while ink washes can shade flock or mixed herbs. A detailed finish paints separate earth and stone areas before a unifying bone drybrush and grass highlights. An image-only sidebar uses Dark Green Ink with either pale bone or green-and-bone drybrushing to alter static grass.
16 paint colours
CommunityWD 307 · pp. 142–143
James Waller welcomes the magazine’s historical coverage and veteran gaming sessions after years away, prompting Guy Haley to discuss serving both established and new hobbyists. Another reader’s confusion over Rick Priestley’s “Lost and the Damp” joke is clarified, and a letter describes stripping old metal figures. Paul J Robinson shares a converted 5,000-point Skaven army after thirteen years of work, while an impatient Wood Elf player receives reassurance about the next issue’s release.
Warhammer Fantasy BattlesSkaven
CommunityWD 307 · p. 143
Owen Rees describes weekly online hobby articles and invites suggestions, linking readers to more Last Alliance scenarios, Tyranid monster background and jungle terrain. His own project adds a cigar-smoking Lieutenant Branton and a shortened, stripped-down Basilisk called Old Faithful to a drop-troop army. Rik Turner explains where the Eye of Terror, Armageddon and Storm of Chaos campaign archives remain available, with an eventual aim of bringing their material into the main website.
Warhammer 40,000Warhammer Fantasy BattlesImperial Guard