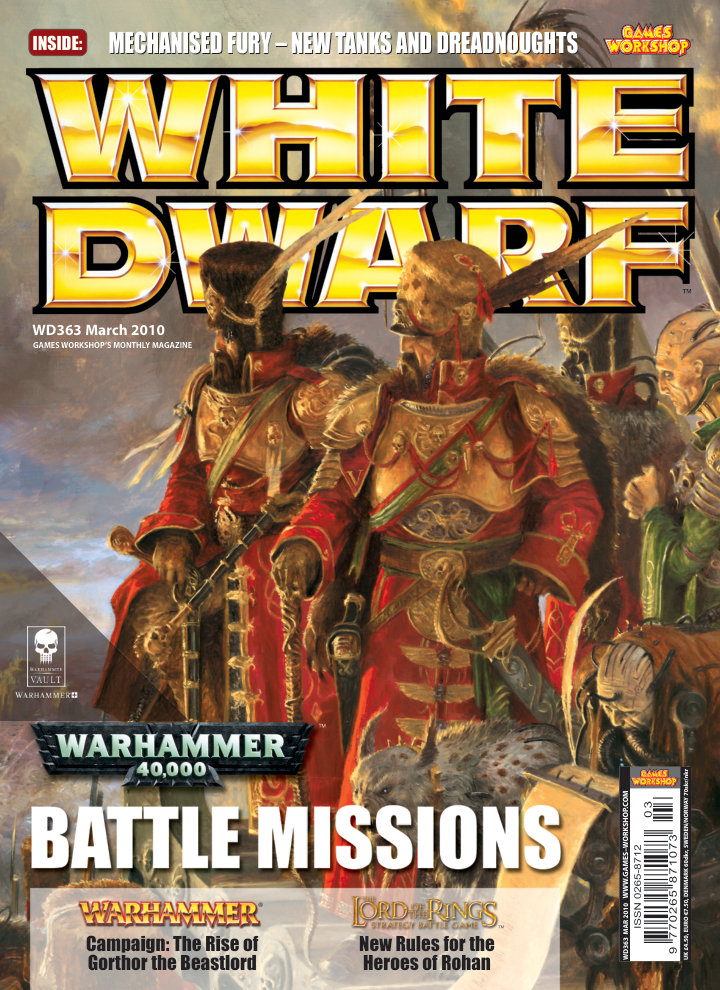
EditorialWD 363 · p. 1
The new Venerable Dreadnought prompts Mark Latham to compare today’s versatile plastic armies with the snap-fit Marines and heavy metal models of his early collections. Interchangeable parts and abundant decoration now let almost every figure become individual, a change he also sees in Orks and the Empire. He ends by recalling his first Blood Angels army as the next month’s release promises another personal return to older hobby enthusiasms.
Warhammer 40,000
CommunityWD 363 · pp. 11–13
Battlehosts is previewed as War of the Ring’s first expansion, grouping formations and heroes into fifty-nine themed fighting forces. Fantasy Flight adds the Warpstone Chronicles to Warhammer: Invasion and concludes Haarlock’s Legacy with Dead Stars. Games Day ticket plans, a Golden Demon winners display and School League preparation accompany a clarification that Black Library’s print-on-demand books are physical publications rather than downloads.
War of the RingWarhammer: Invasion
InterviewWD 363 · p. 14
John Lie explains his journey from varied contract work in Norway to Games Workshop stores in Oslo, Belfast and finally management of Stevenage. An unsuccessful first selection day provides feedback that helps him qualify at a second attempt, followed by demanding training. The interview focuses on the challenge and social appeal of running a new hobby centre, giving a specific staff account behind the surrounding recruitment announcement.
InterviewWD 363 · pp. 15–25
Adam Troke examines new Space Marine, Imperial Guard and Ork vehicle kits through conversations with their designers. The Venerable Dreadnought offers interchangeable weapon arms and extensive personal decoration, the Chimera gains a revised hull and Ork walkers combine ramshackle character with carefully compatible components. Existing transports and a personal Deff Dread conversion show how the new releases can expand both battlefield collections and modelling possibilities.
Warhammer 40,000Space Marines
InterviewWD 363 · pp. 16–17
Colin Grayson and Tom Walton explain the Venerable Dreadnought’s alternative sarcophagi, helmets, armour plates and weapon arrangements. References to older Space Marine designs support its ancient identity, while plug-in guns let players change armament without rebuilding the model. Compatibility with the other plastic Dreadnoughts and the annotated frame map make the kit a source of conversions as well as a decorated veteran in its own right.
Warhammer 40,000Space Marines
TacticsWD 363 · pp. 18–19
The revised Chimera is placed within the Imperial Guard’s wider armoured system: adaptable Leman Russ tanks, close-range Hellhound variants, troop transports and long-range Basilisk support. Each fills a different role, from burning infantry to delivering squads through an offensive. The discussion connects the abundance of recent plastic kits to an army whose identity rests on both massed manpower and the mechanised firepower needed to support it.
Warhammer 40,000Imperial Guard
InterviewWD 363 · pp. 20–23
Dale Stringer describes developing Seb Perbet’s Deff Dread prototype into plastic walkers with interchangeable guns, limbs and decorative components. Killa Kans can share parts with one another and with the larger Dread, while Warbike exhausts and Battlewagon mounts extend their compatibility across the Ork range. The frame breakdowns reveal how deliberate engineering supports the appearance of improvised machines and gives Meks numerous starting points for further alterations.
Warhammer 40,000Orks
ShowcaseWD 363 · p. 25
Keith Robertson assembles a highly individual Deff Dread from components spread across the Ork vehicle range and his Imperial Guard tank spares. Punisher cannons become convincing Ork weapons with extra pipes and plating, while a metal Big Mek force-field backpack is the model’s lone metal component. The showcase demonstrates the new kits’ conversion flexibility without supplying a named paint recipe for the finished machine.
Warhammer 40,000Orks
InterviewWD 363 · pp. 28–29
Adam Troke introduces a scenario book intended to make ordinary pickup armies face unfamiliar tactical problems. Thirty standard missions can be chosen or generated around the participating factions, while three special missions require more deliberate preparation. Examples such as Surprise Attack, Night Fight and Wave Assault show how objectives, deployment and visibility can change a battle’s character without requiring a different collection every time.
Warhammer 40,000
FictionWD 363 · pp. 30–31
Sergeant Learchus leads Ultramarines and Calth Defence Auxilia armour into an ambush against a corrupted supply convoy crossing Calth’s irradiated surface. Their first salvos devastate the lighter vehicles, but a concealed Baneblade turns the apparent success into a desperate withdrawal. Unable to stop the surviving supplies reaching the caverns below, Learchus fixes the monstrous tank in his memory and vows to meet it again with the means to destroy it.
Warhammer 40,000Ultramarines
RulesWD 363 · p. 34
Grimbold joins Théoden’s Host as an armoured, great-axe-bearing captain. His distinctive contribution is allowing Warriors of Rohan to become Strength 4 Helmingas for an additional point per model, giving the army a stronger infantry core. The printed profile and designer’s note explain that his value lies not only in personal combat but in how his presence changes the ordinary warriors collected around him.
Middle-earth Strategy Battle GameRohan
RulesWD 363 · pp. 34–37
Mat Ward returns to the conflict between Rohan and Isengard with new hero rules and a scenario built around their early encounters. Grimbold strengthens ordinary Rohirrim, the experienced Éomer becomes a powerful but grief-driven fighter and Thrydan combines personal violence with wider leadership. Mounted Saruman adds mobility to the White Wizard’s magic, while A Dark Day in Rohan tests whether he can avoid exposing his treachery.
Middle-earth Strategy Battle GameRohan
RulesWD 363 · p. 35
This more experienced Éomer has a stronger fighting profile, heavy protection and the option of an armoured horse. Ride for Ruin transforms him if Théoden or Éowyn falls, increasing his strength and certainty of purpose while sacrificing defence and freedom of movement. The rule captures his grief-fuelled charge on the Pelennor, offering formidable combat power with a narrative limitation once revenge takes over.
Middle-earth Strategy Battle GameRohan
RulesWD 363 · p. 36
Thrydan leads Dunland through physical intimidation and a useful reserve of Might. Mighty Blow makes each successful wound in close combat inflict two, while Lord of Dunland doubles his Stand Fast range to support nearby warriors. His printed entry includes a horse option and weapon choices, and the background frames his alliance with Saruman as an opportunity that may equally turn him into a disposable pawn.
Middle-earth Strategy Battle GameDunland
RulesWD 363 · p. 37
Rohirrim from opposite edges interrupt Saruman’s meeting with Thrydan among the foothills near Fangorn. Killing Rohan’s captains or allowing Thrydan to build his legend scores for Evil, while killing Thrydan or exposing the White Wizard scores for Good. Saruman must limit his magic and avoid combat if he wants to conceal his identity, making escape and restraint as important as defeating the surrounding warriors.
Middle-earth Strategy Battle GameRohan
TacticsWD 363 · pp. 38–43
Adam Troke builds Isengard tactics around elite Uruk-hai infantry supported by inexpensive formations, dangerous specialists and powerful heroes. A large wall of pikes or shields advances relentlessly while flanking troops prevent enemies from attacking it on favourable terms. Ambushers, Sappers and carefully placed Trolls add threats outside that central block, and Jeremy Vetock explains how practical games taught him to balance impressive units with cheaper bodies.
War of the RingIsengard
TacticsWD 363 · p. 39
A large Uruk-hai formation can grind through an enemy through armour, strength or the advantages of pikes, but its flanks need protection. Smaller neighbouring formations guard those vulnerable sides and add charges when the timing is right. Adam emphasises priority in the Charge phase: sometimes holding close rather than charging immediately lets the supporting force respond properly, while the central infantry is tough enough to receive the enemy attack.
War of the RingIsengard
TacticsWD 363 · pp. 40–41
Wild Men and Feral Uruk-hai ambush vulnerable support troops, while screened Sappers use Saruman’s Overlord rule to deliver their explosive threat. Trolls anchor a flank and Berserkers add a brutal supporting charge. Saruman improves leadership and magic, Gríma undermines an enemy formation and Lurtz hunts opposing heroes, giving Isengard several ways to turn a solid infantry advance into a decisive local advantage.
War of the RingIsengard
TacticsWD 363 · pp. 42–43
Jeremy Vetock explains his progression from relying on large Uruk-hai formations to supporting them with cheap Orc archers, ambushers and mobile Warg Riders. These units absorb attention, protect flanks and create openings for the valuable core. Hard-hitting specialists are kept in a second wave so they survive long enough to matter, while the photographed collection gives him a pool from which to tailor a force for each opponent.
War of the RingIsengard
TacticsWD 363 · pp. 46–49
Andy Smillie examines armies that invest heavily in fast, durable combat units and aim to break opponents on the charge. Limited shooting and magic remain necessary to remove redirectors and nuisance troops, but too many supporting answers dilute the main attack. Daemon and Bretonnian examples illustrate the plan, with particular warnings about resilient tar pits and enemy monsters that require a powerful counter-threat of their own.
Warhammer Fantasy BattlesDaemons of Chaos
TacticsWD 363 · p. 47
The 1,992-point Daemon list sends four Flesh Hound units, two individual Fiends and a Bloodthirster forward under substantial magical resistance. Horrors and Heralds supply limited ranged support and dispel resources, with Lore of Beasts movement helping the assault close. The deployment aims to present numerous credible threats immediately, forcing the opponent to choose between stopping fragile fast specialists and allowing the tougher main wave to arrive intact.
Warhammer Fantasy BattlesDaemons of Chaos
TacticsWD 363 · p. 48
Louen Leoncoeur leads a 1,994-point force of knightly lances, Pegasus troops and supporting peasants. The large knight units attack important enemy formations while the King handles the most dangerous opposing combatant, and the mobile Battle Standard Bearer can support charges or hunt smaller targets. Bowmen and a trebuchet remove obstacles to the advance, while Damsels primarily supply protection rather than a competing magical strategy.
Warhammer Fantasy BattlesBretonnia
LoreWD 363 · pp. 50–55
Phil Kelly recounts Gorthor’s transformation from visionary Beastlord into the scourge of Ostland and Hochland. His horde destroys rival greenskins and human settlements before reaching Hergig, where returning knights and a fatal duel with Elector Count Mikael Ludendorf finally break its momentum. The feature supplies a campaign-era chronology, tactical observations and a scenario for the last battle, treating a long-dead character as material for historical games within the setting.
Warhammer Fantasy BattlesBeastmen
TacticsWD 363 · p. 51
Gorthor’s chariot combines reliable impact hits with multiple high-strength attacks and Killing Blow, making the charge the decisive part of his fighting method. Cheap screening troops can flee to open a countercharge, while his extended Leadership range helps them recover. Phil warns that the Beastlord’s weak saving throw makes careless challenges dangerous and that pursuing personal glory too far can deprive the wider army of valuable leadership.
Warhammer Fantasy BattlesBeastmen
LoreWD 363 · pp. 52–54
The chronology follows Gorthor’s invasion through the Imperial calendar, from the knightly crusade that leaves provinces exposed to the Beastlord’s winter death at Hergig. Visions, ritual challenges, green-skin defeats and the gathering of monsters explain how the horde expands before devastating Ostland and Hochland. The final siege culminates in Ludendorf killing Gorthor even as he is mortally wounded, ending a threat remembered long after the survivors rebuild.
Warhammer Fantasy BattlesBeastmen
TacticsWD 363 · p. 54
Khazrak improves the army’s ambush reliability and can choose between punishing enemy characters or striking an entire front rank with his lash. Malagor instead combines powerful sorcery with flight, letting him reach useful casting positions and disrupt nearby enemy leadership. Their contrasting examples expand the feature beyond Gorthor, showing how a named leader can reshape a herd’s approach through army support rather than personal damage alone.
Warhammer Fantasy BattlesBeastmen
RulesWD 363 · p. 55
The Beastmen hold a ruined city with fifty percent more points than the defenders, but the defenders can ambush them from behind. Both armies devote a large share of their points to characters, and only dead heroes and captured banners contribute victory points. Panic immunity sustains the human resistance, making the mission a contest of leadership and decisive duels rather than a simple count of surviving regiments.
Warhammer Fantasy BattlesBeastmen
TacticsWD 363 · pp. 58–59
Synapse creatures must balance the area they cover against the danger of a single loss breaking the chain of control. Overlapping ranges, long broods and careful casualty removal preserve command, while fast or deep-striking leaders can repair gaps. Robin also plans for failure by distinguishing creatures that feed from those that lurk, using the latter for objectives rather than expecting uncontrolled assault organisms to remain in place.
Warhammer 40,000Tyranids
TacticsWD 363 · pp. 58–63
Robin Cruddace places overlapping Synapse coverage at the centre of a successful Tyranid army, supported by advice from Marco Schulze and Tim Sawyer. Different sizes of creatures cooperate to absorb fire, create surprise attacks and maintain continuous pressure. Shooting, reserve arrivals and close combat are treated as parts of one plan, with specific warnings about overextended broods, enemy cover and the need to preserve control after the first assault.
Warhammer 40,000Tyranids
TacticsWD 363 · p. 60
Small swarms, monstrous creatures and Warrior-sized specialists each attract different weapons and solve different battlefield problems. Robin recommends a mixture so the army cannot be defeated by one ideal enemy response, with specialised broods supported rather than exposed alone. Larger broods also maintain Synapse links more easily and avoid multiplying the extra losses suffered by several small units in the same defeated combat.
Warhammer 40,000Tyranids
TacticsWD 363 · p. 61
Paired or grouped broods reach threatening positions together so the opponent cannot eliminate them one at a time. Coordinated attacks from different directions increase that pressure but demand careful timing. Tim Sawyer adds ways to assault enemies in cover, from specialist adaptations to preparatory fire, while Biovores and lingering Spore Mines can slow or distract the defenders before the main swarm closes.
Warhammer 40,000Tyranids
TacticsWD 363 · p. 62
Genestealers and Hive Commander threaten flanks, while Trygons, Mawlocs and Spore-delivered Carnifexes force sudden changes to enemy plans. Lictors improve the reliability of these arrivals and can attack isolated troops or vehicles themselves. Marco Schulze highlights the value of sending a large shooting brood through a Trygon tunnel, ensuring that a unit unable to assault on arrival still delivers an immediate, punishing contribution.
Warhammer 40,000Tyranids
TacticsWD 363 · p. 63
Tyranid shooting maintains initiative, disrupts morale and reduces the attacks that the enemy can return when the swarm charges. Successive waves then keep opponents pinned in place while more suitable creatures finish difficult fights. Zoanthropes and Hive Guard provide anti-tank exceptions to the army’s limitations, and Venomthropes protect even large beasts, while consolidation back towards Synapse prevents a successful advance becoming an uncontrolled one.
Warhammer 40,000Tyranids
Battle reportWD 363 · pp. 66–87
Robin Cruddace’s Imperial Guard attack Phil Kelly’s Ork mechanised horde in a 2,000-point Battle Missions game, with Jervis Johnson analysing key decisions. Early transport kills and an audacious Valkyrie move promise a strong start, but excessive fire against resilient Kans lets Boyz and walkers reach the gun line. The Guard nearly contest enough objectives late on, yet surviving Gretchin secure a 1–0 Ork win, underlining the difference between battlefield destruction and mission success.
Warhammer 40,000Imperial Guard
InterviewWD 363 · pp. 67–68
Jervis Johnson explains that Battle Missions should reveal the characteristic strategies of different armies while testing adaptation with as few extra rules as possible. Standard armies and ordinary terrain remain usable for thirty missions, while three deliberately unusual bonus games require specific preparation. The chosen demonstration forces Imperial Guard to advance into Ork territory, showing how small changes in deployment and objectives can reverse familiar battlefield roles.
Warhammer 40,000
RulesWD 363 · p. 69
The enemy deploys first and the Imperial Guard deploy second at a minimum distance, with no reserves permitted. Two objectives occupy prescribed positions and the Guard place a third after seeing the defenders, forcing an advance to capture the greater share. Paper stray-round markers dropped above the table add unpredictable artillery blasts, while a normal variable game length makes the timing of the final attack uncertain.
Warhammer 40,000Imperial Guard
TacticsWD 363 · pp. 70–71
Robin’s 2,000-point Cadian force divides into a large ordered firebase and a mobile objective-taking contingent in Chimeras and a Valkyrie. Ogryns, a Primaris Psyker, artillery and tanks provide different kinds of support, with Ratlings and a Sentinel acting independently. After learning the mission he plans to exploit second deployment, likely first turn and control of the final objective’s location to break through the Orks and seize their ground.
Warhammer 40,000Imperial Guard
TacticsWD 363 · pp. 72–73
Phil’s 1,999-point army uses two Big Meks to place extra Deff Dreads in Troops slots, resulting in nine armoured walkers. Trukk Boyz, Meganobz and a large foot mob supply the bodies, while Lootas and Kommandos threaten targets the walkers cannot reach quickly. Once Prepared Assault is selected, fast Boyz become a response force and cheap Gretchin remain available for the objective work that the more imposing machines cannot perform.
Warhammer 40,000Orks
TacticsWD 363 · pp. 75–86
Jervis follows the battle’s changing priorities, from the Guard’s distant third objective to the cost of spreading fire across Ork walkers. He praises the Orks’ timed Waaagh! but warns that destroying the enemy can pull even a winning force away from the objectives. The late Imperial effort demonstrates why a battered army should keep playing for a draw, while the final Ork counter-moves show the value of preserving a few scoring models.
Warhammer 40,000Imperial Guard
EditorialWD 363 · pp. 88–90
Jervis Johnson answers the recurring question of whether Games Workshop will introduce more armies. He explains a priority on sustaining existing collections after earlier changes left some hobbyists frustrated, while arguing that familiar armies still contain abundant unexplored ideas. Larger plastic kits, the Collectors Range and Space Hulk demonstrate room for novelty, but he presents whole new armies as something to pursue without weakening support for those already collected.
ModellingWD 363 · p. 91
Mark Jones transforms Moonscape craters into bubbling digestion pools using beads, cable and PVA thickened with talcum powder. The mixture blends the beads into the crater floor and receives a rough stippled texture before drying overnight. Grey crater edges, fleshy interior colours and a final Water Effects coat create the slimy organic appearance, but the guide names no specific paint colours for those descriptive tones.
Warhammer 40,000Tyranids
PaintingWD 363 · pp. 92–97
Adam Troke follows Nick Bayton’s collection built to fight both Westfold skirmishes and major War of the Ring battles. Large Uruk-hai formations anchor the army, while selected heroes and siege units receive extra attention. Fast metallic basecoating, washes, contrasting white hands and lighter bases keep a dark horde readable, and converted mounted characters and a modified tray make the army’s centrepieces practical as well as distinctive.
War of the RingMiddle-earth Strategy Battle GameIsengard11 paint colours
RulesWD 363 · p. 93
Nick’s 2,270-point collection includes all four Fortress of Isengard Epic Heroes, several substantial pike formations and supporting shield and crossbow troops. Sappers, Berserkers, Huscarls, an Isengard Troll and Uglúk’s Raiders broaden the options for campaign games. The unusual total reflects a pool of models from which Nick selects forces for particular battles rather than a claim that every model must always be fielded together.
War of the RingIsengard
PaintingWD 363 · p. 94
A sprayed mixture of black and metal undercoats many Uruk-hai at once, followed by flat skin, cloth and chainmail colours and a generous black wash. Bright metallic edges and dark straps restore separation after shading. Nick’s lighter grey-brown bases and dry grass counter the army’s dark armour, while a test miniature establishes the scheme before it is repeated across the full collection.
Middle-earth Strategy Battle GameWar of the RingIsengard10 paint colours
PaintingWD 363 · p. 95
Nick dabs white onto shields, faces and bodies to imitate the rough handprints seen on the Uruk-hai in the films. Separating the palm and fingers keeps the shape recognisable without making it too polished. Banner symbols receive a cleaner outlined-and-filled treatment, with black used to reshape the palm and fingers, providing two different methods for the same allegiance mark depending on the surface and intended finish.
Middle-earth Strategy Battle GameWar of the RingIsengard2 paint colours
ModellingWD 363 · pp. 96–97
Uglúk’s Raiders, Sappers, Berserkers and the Troll receive extra detail because their battlefield roles and recognisable scenes make them natural focal points. Saruman’s mounted model is accommodated by attaching part of a cavalry tray over an infantry tray, while a Gandalf rider becomes mounted Gríma through a head swap and sculpted collar. These practical conversions let the characters stand out within an otherwise closely organised infantry army.
Middle-earth Strategy Battle GameWar of the RingIsengard
PaintingWD 363 · pp. 98–103
The Eavy Metal team explains how planned symbols, lettering and patterns can be painted onto undecorated surfaces. Paper drafts, scale-aware spacing and plotted points prepare the work, with examples progressing from Chapter badges to an ornate High Elf shield, embroidered cloak borders and a Deathwing banner. Brush control and a logical sequence matter as much as drawing skill, allowing complex images to be assembled from manageable stages.
19 paint colours
PaintingWD 363 · p. 99
The guide begins with three decisions: what the design is, where it will fit and when each part should be painted. Drafting near the final scale exposes spacing problems before they reach the model, especially in lettering. Waypoints transferred from the paper then guide connecting lines and blocked shapes, making repeated insignia more consistent and giving an inexperienced freehand painter a controlled route into more elaborate work.
PaintingWD 363 · p. 100
Neil Green develops a shield design from a white ground and grey outline into flames, a starry blue field and a dimensional central icon. Alternating shade and highlight placement makes the symbol and red jewel appear reflective, while dark coals ground the lower edge. The six-stage example demonstrates how one carefully planned design can combine several visual effects without losing its overall heraldic readability.
Warhammer Fantasy BattlesHigh Elves12 paint colours
PaintingWD 363 · p. 101
Keith Robertson builds repeating cloak borders from regular dots, chevrons and overlapping zigzags. A simple line becomes a row of cross-like shapes, while a second pattern gains an interwoven appearance from dark separation and carefully placed shading. Finished robes by Anja Wettergren and Darren Latham show how the same planning principles can expand into lettering or a celestial illustration on a larger cloth surface.
Warhammer 40,000Space Marines3 paint colours
PaintingWD 363 · pp. 102–103
Joe Tomaszewski assembles a Deathwing banner in successive layers, beginning with boundaries, flame and checks before adding the halo, lightning, wings, skulls and scroll. A cloaked figure and reflective sword complete the image, with thin keylines preserving legibility between adjoining shapes. Lettering starts in the middle of the scroll and is strengthened only after the spacing is correct, making the demanding design a sequence of smaller decisions.
Warhammer 40,000Dark Angels13 paint colours
CommunityWD 363 · p. 117
The report visits Warhammer World’s annual day of thanks for Gaming Club Network volunteers, whose preparation and participation games made up more than half of the preceding Games Day programme. Guests can play for themselves, attend readings, browse Forge World and share a Christmas meal. Certificates recognise all contributors, while Hobby Master awards honour Rob Bastow and Bek Hawkby; the article presents the event as recognition of the sustained unpaid effort behind the wider gaming community.
The Horus Heresy