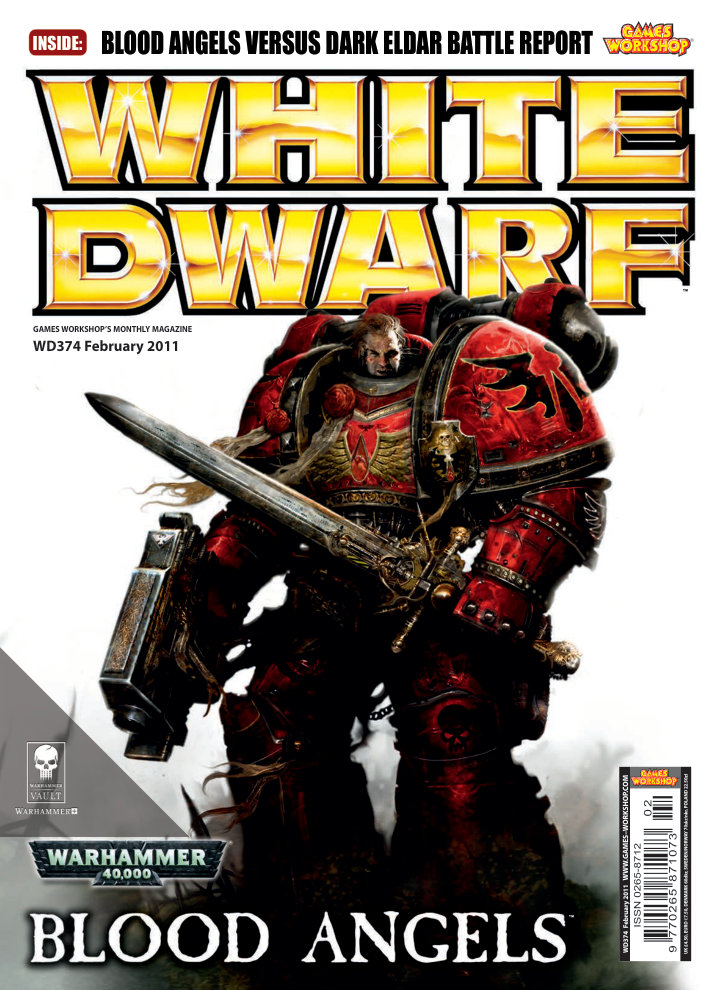
EditorialWD 374 · Inside cover
Andrew Kenrick celebrates the Blood Angels’ new Furioso and Stormraven kits and the excitement of finally seeing the gunship described in the previous year’s Codex. Questions now turn to armament, army composition and painting, and the issue follows that enthusiasm through a battle report, a new mission, Apocalypse formations and two contrasting Battleforce projects.
Warhammer 40,000Blood Angels
CommunityWD 374 · pp. 11–13
News previews Warhammer Forge’s resin monsters and engines, including the work-in-progress Great Toad Dragon, and examines the full-size Space Marine costume commissioned for THQ. Deathwatch’s The Emperor Protects adventure collection and Dawn of War II: Retribution broaden the gaming coverage. The website preview promises further Stormraven material, formations, painting and support for the Armageddon campaign.
Warhammer Fantasy BattlesWarhammer 40,000
InterviewWD 374 · pp. 14–25
Andy Hall speaks with Mat Ward, Dale Stringer and Jes Goodwin about expressing the Blood Angels’ nobility, psychic potential and doomed inheritance in their new models. The Furioso kit grows into three distinct walkers, including a Librarian whose hood and articulated force weapon visibly distinguish him. The Stormraven develops from a gap between small transports and the Thunderhawk into a brutal, recognisably Astartes aircraft, with interchangeable doors, working ramps and landing options that serve the modeller as well as the battlefield story.
Warhammer 40,000Blood Angels
LoreWD 374 · p. 22
Three accounts establish the gunship’s service history: an airborne attack on an Eldar fortress, an Angels Encarmine strike against a Necron dam complex, and Dante’s decapitation of Waaagh! Bludcrumpa. The stories emphasise manoeuvrability, massed missile fire and rapid extraction, presenting the Stormraven as more than a troop carrier. Its contribution lies in delivering warriors directly to the decisive point and surviving the destruction that follows.
Warhammer 40,000Blood Angels
RulesWD 374 · p. 23
The complete 200-point Stormraven entry combines a fast skimmer’s movement with transport space for infantry and a separate Dreadnought. Assault Vehicle, Power of the Machine Spirit, protective ceramite and one-use bloodstrike missiles define its combat role, with alternate weapons and equipment allowing specialisation. Skies of Blood permits a risky disembarkation after a flat-out move, distinguishing a normal assault landing from a high-speed drop.
Warhammer 40,000Blood Angels
TacticsWD 374 · p. 25
Captain Aphael’s 2,000-point sample force uses two Stormravens, jump infantry and complementary Dreadnoughts to deliver a concentrated aerial assault. The conventional Furioso targets covered enemies, while the Death Company walker is directed toward a worthwhile victim before its Rage takes over. Corbulo and a jump-equipped Sanguinary Priest provide resilience and charge bonuses, making careful placement of support characters as important as the army’s speed.
Warhammer 40,000Blood Angels
RulesWD 374 · pp. 26–27
A Blood Angels strike force begins surrounded and must withdraw while leaving its doomed warriors to die gloriously. Victory combines non-martyr units escaping from turn four onward with the destruction of Death Company and other designated martyr squads, then tests that total against a random threshold. Hit and Run helps the survivors disengage, while the enemy’s deployment and reserve options make the escape an active fighting retreat rather than a simple race to a table edge.
Warhammer 40,000Blood Angels
LoreWD 374 · pp. 30–31
Dante confronts a hive transformed into a living Hellspire whose shields protect a ritual summoning a Daemon Lord. Death Company and armoured formations draw the enemy’s attention while Stormravens insert Terminators and Furioso Librarians to destroy the shield reactor. Dante’s Sanguinary Guard then descend upon the exposed summit and kill the summoning’s champion, allowing the surviving Imperials to escape before orbital bombardment destroys the spire.
Warhammer 40,000Blood Angels
RulesWD 374 · p. 32
Astorath gathers Chaplains, multiple Death Company squads and Dreadnoughts into a single Apocalypse force whose warriors intensify one another’s madness. Coherent deployment or a coordinated drop keeps the formation together, while Bloodrage converts each unsaved close-combat wound into another attack that can continue the chain. Optional Tycho lets collectors represent the force during the Third War for Armageddon rather than only the earlier Hellspire battle.
Warhammer 40,000Blood Angels
RulesWD 374 · p. 33
Dante leads a jump-equipped Honour Guard and several Sanguinary Guard squads into a precisely coordinated Deep Strike. The entire formation arrives around him without scatter and gains Careful Planning, then trades shooting and running on arrival for permission to launch an immediate assault. Its background and mechanics both frame it as a weapon for removing the strongest enemy leader rather than grinding through ordinary troops.
Warhammer 40,000Blood Angels
RulesWD 374 · p. 34
Three Stormravens carry paired Terminator and Furioso units into heavily fortified targets, with Apocalypse Flyer and Hover rules representing their larger battlefield role. A coordinated missile attack produces a powerful one-use blast before the aircraft race toward the target and disgorge their passengers. The formation also grants Vital Objective, tying its specialised insertion force to the seizure of a crucial position.
Warhammer 40,000Blood Angels
RulesWD 374 · p. 35
A Land Raider Redeemer and flamestorm-armed Baal Predators combine their weapons against massed infantry. Three or more contributing tanks replace ordinary shots with a large hellstorm attack, and its marked path remains dangerous to units crossing it until the next shooting phase. Heavy flamer sponsons improve the attack’s reliability, making the formation both a concentrated killing tool and a temporary barrier across an enemy approach.
Warhammer 40,000Blood Angels
TacticsWD 374 · pp. 36–41
The second army-selection guide turns to Evil, comparing Isengard’s armoured infantry, the varied Fallen Realms, Mordor’s hordes, the Misty Mountains’ creatures and Angmar’s spectral forces. Each contributor links a faction’s identity and leaders to a workable starting collection and battlefield role. After weighing them, Andy Hall chooses Angmar because its ghostly contingents let him explore a wide range of miniatures while filling a gap in the studio’s armies.
War of the RingIsengard
TacticsWD 374 · p. 37
Nick Bayton builds Isengard around durable Uruk-hai formations, particularly pike phalanxes able to blunt Rohan’s cavalry. Cheaper Orcs and Dunlendings expand the army, while Trolls protect an Assault Ballista and add counterattack strength. Four Uruk-hai boxes provide a practical core of pikes and shielded warriors; Saruman, Lurtz, Gríma and Thrydan offer very different forms of leadership and disruption.
War of the RingIsengard
TacticsWD 374 · p. 38
Mat Ward presents the southern and eastern armies as an opportunity for varied troops, exotic models and strong colours. Harad’s diverse forces, Rhûn’s disciplined infantry and Khand’s horse and chariot warriors can be combined or collected as a focused regional host. Heroes, allied Nazgûl and the iconic Mûmak provide further directions, with the Mûmak War Herd Battlehost demonstrating how several great beasts can define a force.
War of the RingFallen Realms
TacticsWD 374 · p. 39
Chris Peach recommends using Mordor’s abundant Orcs to gain numerical strength, then adding elite formations, monsters, artillery and formidable magical leaders. Morannon Orc boxes establish spear and hand-weapon companies before a Nazgûl joins to command them. The Ringwraiths can appear as individual Epic Heroes, mounted monsters or a combined formation, illustrating how the same powerful characters support several styles of Mordor army.
War of the RingMordor
TacticsWD 374 · p. 40
Tom Hutchings combines cheap Goblin companies with exceptionally dangerous monsters, from the Balrog and Cave Drake to Dragons and giant spiders. Lesser beasts gain value from flank attacks rather than frontal contests, while Goblins exploit the damage their larger companions cause. A few Goblin boxes and a chosen monster begin the collection; Drûzhag is highlighted for players who want a host of animals and the ability to create more during battle.
War of the RingMisty Mountains
TacticsWD 374 · p. 41
Andy Hall describes Angmar as a mixture of numerous expendable Orcs and costly spectral specialists whose unusual attacks weaken foes for other creatures to finish. Its heroes include the Witch-king, Gûlavhar and ambushing Buhrdûr, while a core collection can combine Mordor Orcs with Army of the Dead figures for Ghostly Legions. Andy’s own plan extends the spectral theme across Elves and Dwarves as well, making painting possibilities central to his choice.
War of the RingAngmar
TacticsWD 374 · pp. 42–49
Jeremy Vetock builds a Skaven plan around cheap ranked units that hold the enemy while Rat Ogres, Doomwheels and Abominations deliver the decisive blow. Battle standards and great altars improve reliability, while protected weapon teams and artillery remove threats to that living wall. He explains careful deployment, timing random movement, useful magical and character combinations, and when an apparently expendable unit can do more than simply absorb casualties. Counter-tips from other studio generals also reveal the weaknesses opponents should attack.
Warhammer Fantasy BattlesSkaven
TacticsWD 374 · p. 45
A comparative guide matches each Skaven weapon team to a job and an associated risk. Warpfire threatens dense formations, Doom-flayers add close-combat force, Ratling Guns check small mobile units, Warp-grinders disrupt the enemy rear and Poisoned Wind Mortars bypass armour and high Toughness. A central practical recommendation is to keep the fragile teams hidden until the battlelines engage, then expose them only when a worthwhile shot becomes available.
Warhammer Fantasy BattlesSkaven
TacticsWD 374 · p. 48
A 1,998-point sample army gives the article’s core plan a concrete deployment. Deep Clanrat blocks and Stormvermin hold the line, with deliberate gaps for Rat Ogres, an Abomination and Doomwheel to attack through. Characters remain in safer rearward positions where possible, the Grey Seer acts as a mobile magical wildcard, and Gutter Runners threaten the flanks or rear while the cannon finds clear lines of fire.
Warhammer Fantasy BattlesSkaven
InterviewWD 374 · pp. 52–53
Gav Thorpe explains why fiction must interpret the qualities behind tabletop rules rather than translate numerical profiles literally. Army lists represent common organisations, leaving room for unusual task forces and practical battlefield improvisation, while individual Marines can remain distinct within their shared archetype. Fearlessness changes the source of dramatic tension: duty, failure, loyalty and an unfinished mission can threaten a Space Marine even when pain and death do not.
Warhammer 40,000Space Marines
Battle reportWD 374 · pp. 54–73
Matt Hutson’s Blood Angels meet Phil Kelly’s Dark Eldar in a 1,750-point Annihilation battle on Olthis. The Stormraven destroys two skimmers immediately and delivers devastating Death Company units, but Sythrac and the Incubi kill Astorath and his escort while the remaining raiders exploit isolated targets. Lelith’s late arrival overturns the midfield fight before she dies to the damaged gunship’s fire. Phil finally destroys the Stormraven and crippled Librarian Dreadnought, bringing the battle to an 8–8 draw and leaving both sides to reflect on the speed and violence of the contest.
Warhammer 40,000Blood Angels
EditorialWD 374 · pp. 74–75
Jervis Johnson argues that a successful campaign is designed around the needs, schedules and interests of its particular players. One organiser should make decisions while listening to the group, adapting ideas from published systems rather than assuming one format fits everyone. His studio example combines a strongly realised map and characters with armies that grow as they are painted, showing how campaign design can serve both narrative play and collecting projects.
CampaignWD 374 · pp. 76–87
The White Dwarf team revisits the Third War for Armageddon through a two-sided Planetary Empires campaign using Matt Hutson’s map and historically appropriate armies. Background recounts Ghazghkull’s preparation, the enormous invasion and the Imperium’s desperate response, then customised turns and character bonuses reproduce its changing phases. The first games, Rok landings and showcased forces demonstrate the system in use while setting up the following issue’s conclusion.
Warhammer 40,000Imperium
LoreWD 374 · pp. 77–81
Armageddon’s earlier wars establish why its survival matters, from Angron’s Chaos invasion to Yarrick’s resistance against Ghazghkull. The account then follows the Ork warlord’s decades of preparation, renewed fleets, Roks, teleporters and unexpected seaborne assaults. Heroism by Guard, Marines and Titans repeatedly checks the attack, but betrayal, vast losses and the continuing flow of greenskins leave the industrial world locked in an unresolved struggle with consequences for the Imperium itself.
Warhammer 40,000Orks
RulesWD 374 · pp. 82–83
Imperial and Ork teams compete for map locations over five campaign turns, with players aiming to fight twice per turn and accumulating location-based victory points. Spaceports enable distant attacks, jungle access depends on Cerbera Base, and the initial Ork landings are determined by physically dropping Rok markers onto the map. Later turns reward Planetstrike, cityfighting and Spearhead victories before a final Apocalypse battle grants an extra conquest, connecting the campaign’s mechanics to the invasion’s history.
Warhammer 40,000Imperium
RulesWD 374 · p. 84
Named character markers add distinct strategic abilities to the map campaign. Yarrick makes his position exceptionally hard to capture, Tu’Shan supports spaceport operations and Tycho can trigger a retaliatory conquest; Ghazghkull improves attacks nearby while Snikrot bypasses shield-generator bonuses. Orkimedes introduces the Red Orktober as a mobile sea-based foothold, allowing the Ork team to reproduce its unexpected coastal attacks.
Warhammer 40,000Imperium
Battle reportWD 374 · p. 85
Ten studio players gather to begin the campaign, drop the first Roks and choose where their heroes will operate. Andrew Kenrick’s Salamanders overcome an Ork attack near Helsreach, and Adam Troke’s new Steel Legion win their debut when a Vanquisher destroys Jim Sowter’s prized Battlewagon. Other games and Phil Kelly’s planned coastal assault show the opening battles growing out of the map’s specific locations and character options.
Warhammer 40,000Salamanders
ShowcaseWD 374 · pp. 86–87
Four campaign armies illustrate different approaches to the war: Matt Hutson’s close-range Black Templars, Nick Bayton’s fire-support Guard, Christian Byrne’s fast red Orks and Fil Dunn’s massive Goff collection loaned to Jim Sowter. Notes connect transports, flamer-equipped vehicles, objective-grabbing Trukk Boyz and larger engines to each commander’s intended role. The forces remain personal collections while fitting the campaign’s restriction to armies present in the historical conflict.
Warhammer 40,000Black Templars
ShowcaseWD 374 · pp. 88–93
Christian Byrne completes almost 130 Ostermark models in six months for A Tale of Four Gamers, adapting to brighter provincial colours while retaining a consistent standard. Named characters and regiments, freehand shields, copied heraldic banners and eccentric militia give the army a local identity. Yellow-and-purple elites, Reiksguard red and white, varied artillery and a carefully detailed Steam Tank keep the collection diverse without losing its shared history and colour language.
Warhammer Fantasy BattlesThe Empire7 paint colours
PaintingWD 374 · p. 93
Christian’s artillery collection experiments with several Imperial engines while repeating provincial colours on the crews. Bronze washed with black provides the main metallic treatment, and thin turquoise, white and green mixtures add verdigris to the recesses. The Steam Tank combines bronze, silver and gold, with carefully painted scrollwork naming it Sigmar’s Hammer and identifying its engineer.
Warhammer Fantasy BattlesThe Empire7 paint colours
PaintingWD 374 · pp. 94–101
Nick Bayton and Duncan Rhodes each build and paint a Blood Angels Battleforce and Captain, producing two noticeably different forces from the same components. Duncan’s clean newly arrived strike force contrasts with Nick’s battered campaigning 3rd Company. Their choices alter posing, jump-pack allocation, transport passengers, heraldry and bases as well as paint finish, demonstrating how a small common starting set can support distinct stories and battlefield intentions.
Warhammer 40,000Blood Angels
ShowcaseWD 374 · pp. 95–97
Duncan combines a 2nd Company Tactical Squad with an 8th Company Captain and Assault Marines to represent reserve troops joining a campaign. Gleaming armour suggests their arrival before the first engagement, while aggressive assault poses contrast with the Tactical Marines’ grounded firing positions. Death Company ride in a black Rhino and the jump-equipped Captain attacks elsewhere, making the visual differences reflect the force’s intended actions.
Warhammer 40,000Blood Angels
PaintingWD 374 · p. 96
Duncan prioritises getting a neat army ready quickly, spraying a Foundation red and then a brighter red over the armour. One thinned brown wash establishes the recesses and a narrow orange highlight defines the edges. Silver in the joints and exposed hoses completes a short sequence whose restraint makes it suitable for repeating across many Tactical Marines.
Warhammer 40,000Blood Angels5 paint colours
PaintingWD 374 · p. 97
Duncan uses successive masking-tape positions to establish straight, evenly widened red crosses on the black Rhino’s doors. A Foundation-to-bright-red sequence builds their colour, while a painted-over circular transfer provides a clean base for the Blood Angels symbol. The guide shows how simple tools and reused transfer shapes can make large heraldry precise without relying entirely on freehand geometry.
Warhammer 40,000Blood Angels3 paint colours
ModellingWD 374 · pp. 98–100
Nick’s Ironhelms are a force worn by years away from Baal, with muted colours, scenic bases and poses developed from separate legs, armed torsos and heads. He paints models and bases separately so spraying the armour does not coat the terrain red. The Captain and Assault Squad use the Rhino, leaving jump packs to the Death Company, and small swaps from the dedicated frame give the ordinary Marines a distinctly Blood Angels appearance.
Warhammer 40,000Blood Angels
PaintingWD 374 · p. 99
Nick sprays the models red over black, then restores the non-armoured areas before shading the plates with a dark flesh-and-red mixture. Orange highlights establish the edges without making the overall army as pristine as Duncan’s example. This controlled base scheme prepares the surfaces for extensive chips and worn markings while keeping many models efficient to paint together.
Warhammer 40,000Blood Angels6 paint colours
PaintingWD 374 · p. 99
Nick paints orange shapes where armour would wear, then fills them with a dark grey-black mixture while leaving the orange rim visible. A simple crossed guide establishes the blood-drop outline, which is filled in pale stone and chipped by stippling the surrounding red back over it. Both demonstrations make damage follow plausible edges and exposed areas instead of scattering it arbitrarily across the model.
Warhammer 40,000Blood Angels5 paint colours
PaintingWD 374 · p. 101
The Rhino takes Nick’s battered aesthetic furthest, combining drilled bullet holes, soot, scratches, chipped transfers and thick lower-hull mud. Chainmail exposes raw metal beneath the painted surface, while Forge World powders supply accumulated dirt and burning. The large blood-drop design repeats the infantry method at vehicle scale, making the transport look heavily used yet still recognisably part of the same company.
Warhammer 40,000Blood Angels1 paint colour