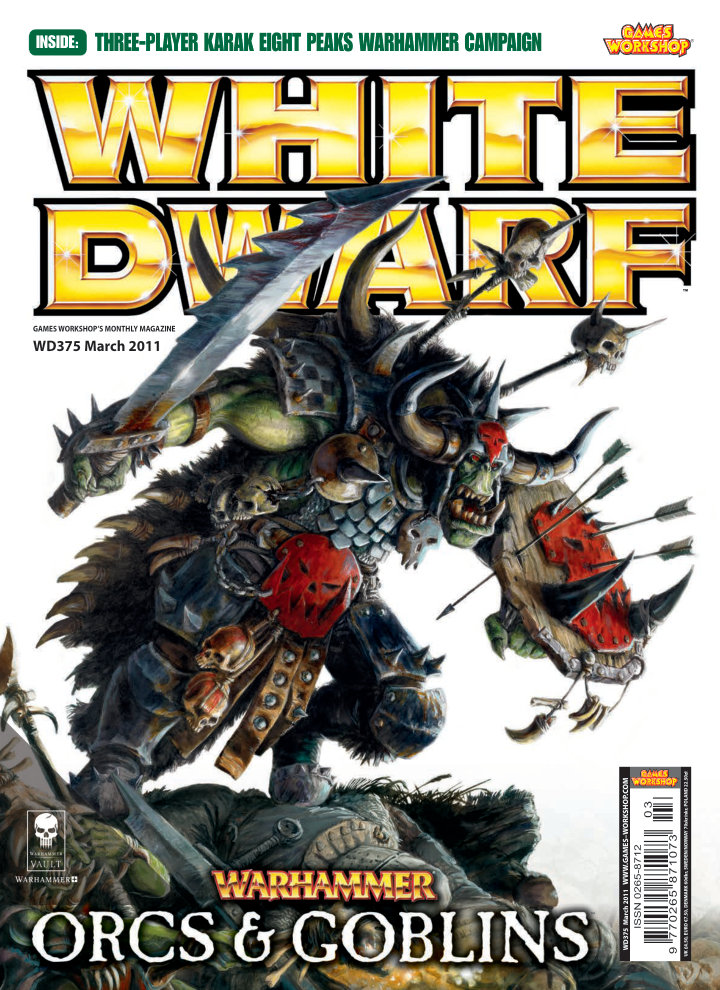
EditorialWD 375 · Inside cover
Andrew Kenrick welcomes the largest plastic Warhammer monster yet, the Arachnarok Spider, and the first full-colour hardback army book for the new edition. The release shapes the issue’s enormous battle, painting workshop and Karak Eight Peaks campaign, while Dol Guldur and Armageddon offer other linked games. The editorial also bids farewell to Adam Troke as he returns from White Dwarf to games development.
Warhammer Fantasy BattlesWarhammer 40,000
CommunityWD 375 · pp. 14–17
Golden Demon preparations include studio painters’ work on their Open-category entries and a forthcoming display of the previous year’s winning miniatures. Games Day announces its Skaven Warlord miniature, subscriber seminars and the new Armies on Parade competition. Other news previews The Frozen Reaches for Rogue Trader, the Wood Elves’ arrival in the Morrslieb card-game cycle, and the website’s growing archive of scenarios and hobby guides.
Warhammer 40,000Warhammer Fantasy Battles
InterviewWD 375 · pp. 18–29
Adam Troke explores the new Orcs & Goblins army book with Jeremy Vetock and the designers of its Savage Orc and Arachnarok kits. Vetock expands the distinct lives of greenskin tribes while revising Animosity and making Choppas express Orc strength across weapon choices. Mark Harrison describes fitting primitive materials, Big Stabbas and ranking-friendly poses onto the Savage Orc frames; Alex Hedström explains the Arachnarok’s menacing stance, modular howdah crew and proliferation of spare spiderlings.
Warhammer Fantasy BattlesOrcs & Goblins
RulesWD 375 · p. 26
The Arachnarok’s complete rules portray a huge venomous monster carrying a separately attacking Forest Goblin crew. Its thick armour, Stubborn nature and terrain-traversing abilities keep it mobile and difficult to dislodge, while one nominated Venom Surge attack can cause D6 wounds to a formidable victim. The howdah rules explain which characteristics the combined model uses and how a Great Shaman changes shooting allocation.
Warhammer Fantasy BattlesOrcs & Goblins
TacticsWD 375 · pp. 28–29
Adam Troke’s 2,747-point mixed army puts Grimgor and his versatile Black Orc bodyguard at its centre. Spear-armed Big ’Uns gain a battle standard’s steadiness, while Savage Orc cavalry, an Arachnarok and a Giant supply further killing power. Goblins are expendable units that pin enemies in place, leaving Wolf Riders and the larger monsters to help the proper Boyz finish the fight.
Warhammer Fantasy BattlesOrcs & Goblins
CampaignWD 375 · pp. 32–39
Jeremy Vetock turns the three-sided struggle for the Dwarfhold into a flexible campaign for Dwarfs, Night Goblins and Skaven. Preliminary battles earn points that buy reinforcements or random events in the final confrontation; free faction leaders accumulate injuries or deaths, making victories personal. Underground games impose hazardous movement on cavalry and flyers, and naming characters and locations helps a loosely scheduled series acquire a shared history.
Warhammer Fantasy BattlesDwarfs
LoreWD 375 · pp. 32–34
The once-prosperous hold survives centuries of greenskin invasions before Skaven undermining, poisoned water and depleted defences force King Lunn’s people into exile. Belegar eventually retakes the citadel, but his return creates only a besieged island above the contested depths. Skarsnik controls the surrounding peaks while deliberately attracting more Dwarfs into his trap, and Queek is ordered back to complete Clan Mors’ conquest of the City of Pillars.
Warhammer Fantasy BattlesDwarfs
RulesWD 375 · p. 36
An attacker tries to demolish a key enemy resource such as a fungus forest or Dwarf brewhouse, while the defender sets up the battlefield and guards the objective. The scenario gives normally indestructible scenery Toughness and Wounds, allowing direct attacks and template fire to damage it. A substantial victory-point bonus rewards either its destruction or survival, making the terrain itself the battle’s focus.
Warhammer Fantasy BattlesDwarfs
RulesWD 375 · p. 37
Two armies contest a defensible passage with a clear central killing ground. Extra points reward units that break into the opposing half and the side holding the most units near the centre, forcing a choice between penetration and control. Universal Hatred, upgraded to Eternal Hatred where already present, makes the struggle unusually vicious.
Warhammer Fantasy BattlesDwarfs
RulesWD 375 · p. 38
An outnumbered defender begins near the centre and tries to withdraw toward safety as a stronger attacker advances from the opposite edge. Surviving units and those escaping earn additional points, but withdrawal requires an ordinary move rather than a march. The attacker can send a Core unit in from another edge as escape-blockers, creating a moving battle rather than a static last stand.
Warhammer Fantasy BattlesDwarfs
RulesWD 375 · p. 39
The campaign ends with three armies fighting for the throne hall: the least successful force deploys centrally while its rivals enter from opposite edges. Keeping a general alive, killing enemy leaders and holding the ruined throne all provide large bonuses beyond ordinary casualties. Random cave-ins, squigs, traps, ancestors and magical surges disrupt the battle, with faction modifiers and purchased campaign events preserving the history of earlier games.
Warhammer Fantasy BattlesDwarfs
LoreWD 375 · pp. 40–45
Phil Kelly explains how Commorragh’s gladiatorial spectacles feed the Dark Eldar’s withered souls while containing the violence that would otherwise destroy their society. Succubi combine sporting celebrity, political patronage and raiding leadership, using theatrical vulnerability and impossible agility to humiliate their opponents. The accompanying cult histories show how this common institution produces radically different philosophies of betrayal, flight, sacrilege and ritual frenzy.
Warhammer 40,000Dark Eldar
LoreWD 375 · p. 41
The Cult of the Cursed Blade regards treachery as a virtue and earns its name by rebelling against its own patrons. Constant betrayal eliminates weaker members and encourages weapons that deceive an opponent: razorflails, concealed blades and apparently decorative poisoned ornaments. Inviting the cult into an Archon’s palace is therefore almost an act of deliberate self-destruction.
Warhammer 40,000Dark Eldar
LoreWD 375 · p. 42
Red Grief Wyches specialise in killing on the move, springing between Raiders, jetbikes and skyboards as their aerial formations reach an enemy. Their transports scarcely slow while the gladiators touch the ground only long enough to deliver a fatal blow. The cult turns the general Wych preference for evasion into an entire style of airborne warfare.
Warhammer 40,000Dark Eldar
LoreWD 375 · p. 42
The Pain Eternal abandons regular performances in Commorragh for a spacefaring crusade against the sacred places of other species. Serving Hekati through iconoclasm, its warriors attack shrine worlds and repeatedly clash with the Adepta Sororitas. Their leaders claim that destroying saints and faith is part of a greater effort to bleed away the strength of the gods themselves.
Warhammer 40,000Dark Eldar
LoreWD 375 · p. 43
Named for Khaine’s destruction of Lileath’s hearth-moon, the Seventh Woe makes the end of innocence its organising principle. Children learn weapons before speech and grow within an oppressive training regime. Many escape into Hellion gangs, but those who remain become unusually accomplished killers through lifelong immersion in violence.
Warhammer 40,000Dark Eldar
LoreWD 375 · p. 43
The Blade Denied stages reversals in which an apparently helpless Wych disarms an armed opponent and turns his weapons against him. Its realspace raids reproduce that theatrical imbalance by attacking superior numbers and fortified positions with light equipment. Haywire grenades and improvised use of enemy technology allow the gladiators to open seemingly impregnable targets and savour the victims inside.
Warhammer 40,000Dark Eldar
LoreWD 375 · p. 44
Lelith Hesperax raises the Cult of Strife to pre-eminence through speed, artistry and performances that attract vast paying audiences. Her admirers include Asdrubael Vect, cementing the cult’s association with the Kabal of the Black Heart. Lelith’s comparatively infrequent raids bring fresh trophies home, while her absence also drives bored nobles to launch their own attacks on realspace.
Warhammer 40,000Dark Eldar
LoreWD 375 · p. 45
Hythnamene Veilblood’s cult deliberately enters the dangerous Eldar killing trance, Khaélas Maenaid. Bloody preparatory rituals erode intellect until the Wyches and Beastmasters act as creatures of instinct and frenzy. In that state they mutilate victims rather than simply killing them, matching the savagery of the predatory beasts they unleash.
Warhammer 40,000Dark Eldar
LoreWD 375 · pp. 48–50
The account follows Sauron’s secret return to Greenwood and the corruption that turns it into Mirkwood. Gandalf’s discovery eventually forces the White Council to act, but the Necromancer divides its allies by attacking Thranduil while striking the assembled Wizards. Elrond’s relief of the northern Elves allows the forces of the Wise to reunite and advance on Dol Guldur, providing the background for the linked battles that follow.
War of the RingElven Kingdoms
RulesWD 375 · p. 51
Thranduil’s Wood Elves defend northern Mirkwood against Khamûl’s larger army while awaiting Elrond’s relief force. Evil wins by killing both Elf leaders; Good must reduce the invaders to a third of their starting strength. Reinforcements enter from a randomly determined flank, and the still-living forest can damage Evil formations moving through its trees.
War of the RingElven Kingdoms
RulesWD 375 · pp. 52–53
The White Council and its allies assault Dol Guldur to draw out and destroy the Necromancer. Approaching the tower forces Sauron onto the battlefield, while the Evil player can recycle destroyed common formations through nearby lairs. Campaign links carry forward Thranduil’s and Elrond’s survival and reward an earlier Elven victory with an extra warband.
War of the RingElven Kingdoms
RulesWD 375 · p. 53
An optional ending switches from War of the Ring to the Strategy Battle Game for a close confrontation between the surviving named heroes and the Necromancer. The preceding mass battle instead determines which Good heroes reach the tower, after which both sides receive small numbers of reinforcements around a compact battlefield. Good must kill the Necromancer, making the finale a personal struggle rather than another army engagement.
Middle-earth Strategy Battle GameWhite Council
TacticsWD 375 · pp. 54–61
Mat Ward compares the ordinary fire-support Dreadnought, rage-driven Death Company walker and versatile Furioso. He recommends blood talons against infantry and blood fists against armoured targets, then weighs heavy flamers, frag cannons and magna-grapples by role. Furioso Librarians benefit from powers usable in different players’ turns, while the need for scoring infantry prevents a genuinely all-Dreadnought force.
Warhammer 40,000Blood Angels
TacticsWD 375 · p. 59
The 1,500-point Blood Creed force fields six Dreadnoughts alongside a Reclusiarch, Death Company and two scoring infantry squads. A Librarian shields the advancing assault element while the remaining troops defend the home objective or provide covering fire. Ward stresses eliminating dangerous anti-armour weapons and monstrous creatures completely, while acknowledging that the army’s lack of transport makes its approach slow and exposed.
Warhammer 40,000Blood Angels
TacticsWD 375 · p. 60
The Stormraven trades the Land Raider’s protection for exceptional firepower, speed and the ability to carry both infantry and a Dreadnought. Ward compares anti-tank and anti-infantry weapon combinations and explains how Power of the Machine Spirit keeps it dangerous at speed. The reproduced Skies of Blood rule permits a risky high-speed drop, although the passengers cannot charge immediately afterward.
Warhammer 40,000Blood Angels
TacticsWD 375 · p. 61
Red Wind exchanges Blood Creed’s fire-support walkers for two Stormravens while retaining three Dreadnoughts and sufficient objective holders. The gunships can deliver paired infantry-and-walker assault groups, with one clearing an objective and another securing it. Keeping the aircraft as fire support is a viable alternative when transporting so much of the army would risk losing it to a single decisive shot.
Warhammer 40,000Blood Angels
Battle reportWD 375 · pp. 64–83
Jervis Johnson and Nick Bayton’s 3,997-point greenskin army, including three Arachnaroks, faces Mat Ward’s Bretonnians and Matt Hutson’s Dwarfs in Dawn Attack. Random deployment isolates the Trolls, Goblin artillery and Foot of Gork destroy the Bretonnian contingent, and misplaced Fanatics devastate their own cavalry. The Dwarfs nevertheless win: cannon fire and a heavily runed Lord kill the spiders, while the remaining Ironbreakers finally rout Wurrzag’s Savage Orcs in the decisive late combat.
Warhammer Fantasy BattlesOrcs & Goblins
EditorialWD 375 · pp. 84–85
A museum display of Roman dice leads Jervis Johnson to consider gamers’ rituals, superstitions and attachment to these ancient tools. He contrasts a single die’s equal chances with the distribution of summed dice and explains why previous rolls do not change the next result. For a designer, that uncertainty creates fresh tactical situations; for players, attributing defeat to the dice can also soften the disappointment.
CampaignWD 375 · pp. 86–93
Adam Troke concludes the studio’s five-week Planetary Empires campaign, whose historically appropriate armies and named commanders turn ordinary games into episodes of a shared war. The Orks recover from a poor opening by exploiting Snikrot, Ghazghkull and Orkimedes to seize or isolate hive tiles. Short accounts of tank, city and siege battles lead into the final Apocalypse confrontation at Hades Hive, where an Imperial victory narrowly decides the campaign.
Warhammer 40,000Orks
Battle reportWD 375 · pp. 92–93
Five Ork Waaaghs! face three Space Marine Chapters and two Guard regiments in the campaign’s final Apocalypse battle. Black Templars hold the left after losing Grimaldus, while a Salamanders thrust meets enormous counter-attacks on the right. Ghazghkull devastates the Imperial centre before Yarrick, Tycho and Terminators bring him down; with the objectives still in Imperial hands, the defenders secure Armageddon.
Warhammer 40,000Orks
ShowcaseWD 375 · pp. 94–95
Darren Latham introduces the team’s greenskins through varied skin tones, tribal insignia and carefully placed freehand decoration. Checks and dags break up armour and weapons, warpaint adds interest to exposed Savage Orc flesh, and patterned Night Goblin hoods frame the face. Contrasting Boar Boy schemes show how rider, mount and tribe can remain distinct within a recognisably Orc collection.
Warhammer Fantasy BattlesOrcs & Goblins2 paint colours
PaintingWD 375 · pp. 98–103
Duncan Rhodes and Nick Bayton build a primitive-themed force around Savage Orcs, Forest Goblins and an Arachnarok. Planning the whole army first avoids wasted components and fixes each model’s position, letting the painters concentrate their best highlights on visible front ranks. Foundation basecoats, washes and selective highlights provide a quick common method, while different skin tones, shared blue decoration and the giant spider’s glassy eyes create variety within the unified force.
Warhammer Fantasy BattlesOrcs & Goblins30 paint colours
ModellingWD 375 · p. 99
The four-rank demonstration progressively reduces finishing work toward the rear, painting only the parts visible in the assembled mob. A carefully planned modular movement tray fixes the Big Stabba, command group and mixed base sizes in position before painting starts. Joining two floor sheets and edging all four sides produces a rigid tray, with a painted floor and sanded rim that remain presentable as casualties are removed.
Warhammer Fantasy BattlesOrcs & Goblins1 paint colour
PaintingWD 375 · p. 100
The forty-strong horde begins with sprayed Knarloc Green over black, simple Foundation colours for equipment and a liberal Devlan Mud wash. Reapplying base colours and layering Goblin Green quickly restores strong green skin, while progressively lighter bone, stone, red and metallic details finish the visible models. Mixed base sizes and staggered positioning prevent the unit from looking like a uniform parade despite its coherent palette.
Warhammer Fantasy BattlesOrcs & Goblins15 paint colours
PaintingWD 375 · p. 101
Nick paints the riders with the infantry’s method so the mounted unit belongs naturally to the same army. The boars receive sprayed Scorched Brown fur with successive drybrushes, followed by shaded and highlighted pale-brown flesh. A darker mount and red rather than blue warpaint distinguish the leading Shaman without abandoning the force’s shared palette.
Warhammer Fantasy BattlesOrcs & Goblins5 paint colours
PaintingWD 375 · p. 101
Blue warpaint ties the Savage Orc infantry and boar cavalry together. Mordian Blue establishes the design, Enchanted Blue brightens it and Asurmen Blue is placed directly into depressions to preserve the underlying sculpt. Orc markings finish with Ice Blue, while the boars use a more muted blue-and-khaki highlight suited to their brown faces.
Warhammer Fantasy BattlesOrcs & Goblins5 paint colours
PaintingWD 375 · p. 102
A sepia wash and Gretchin Green highlight make the Forest Goblins lighter than their Orc allies. Their spiders combine drybrushed black carapaces with pale exposed flesh and red eyes, while varied abdomen designs reuse the same restrained palette. Blue feathers echo the army’s warpaint, linking the Goblin contingent to the Savage Orcs without making their skin identical.
Warhammer Fantasy BattlesOrcs & Goblins16 paint colours
PaintingWD 375 · p. 103
The centrepiece uses a black, grey-drybrushed carapace against very pale joints, undersides and mandibles, creating the unsettling appearance of a real house spider. Its red eyes gain a glassy depth through repeated thin Baal Red washes and a final white reflection. Brown timber, washed webbing and Goblins painted like the Spider Riders integrate the elaborate howdah, while spare spiderlings and slate enrich the large base.
Warhammer Fantasy BattlesOrcs & Goblins16 paint colours